One of the most distinctive features of an iOS devices is the great selection of ringtones. Many people want to have their unique or customized ringtone on their iOS device and to import or download ringtones they like to their iPhone/iPad running iOS 13. However, most of the users now are asking how to transfer ringtones to iOS 13 without iTunes. Luckily, there are quite a few practical ways to do it.
Best Ways to Transfer Ringtones to iOS 13 without iTunes
ApowerManager
One of the tools that you can use is ApowerManager. It is a phone management tool that can be used to organize various types of files on your Android or iOS device using a Mac or Windows computer. You can use it to transfer music and ringtones from your phone to your PC and vice versa. Here are the steps on how to use ApowerManager to transfer ringtones to iOS 13.
Step 1: Download and install the program on your PC and your iPhone or iPad running iOS 13. Launch the app afterwards.
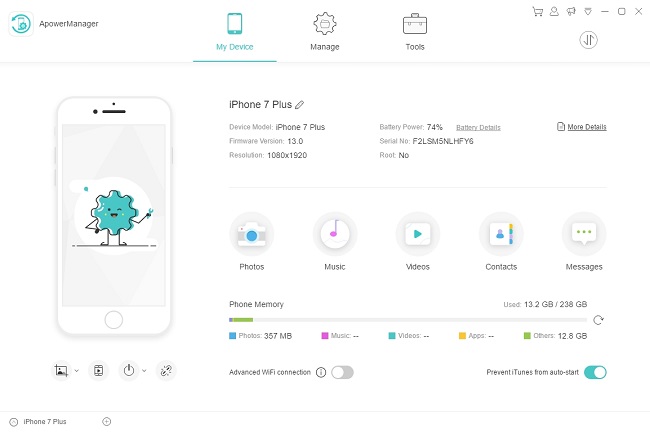
Step 2: Connect your iOS device to PC using a lightning cable. Once connected, your phone’s information will be shown on the program interface on the PC version’s program interface.
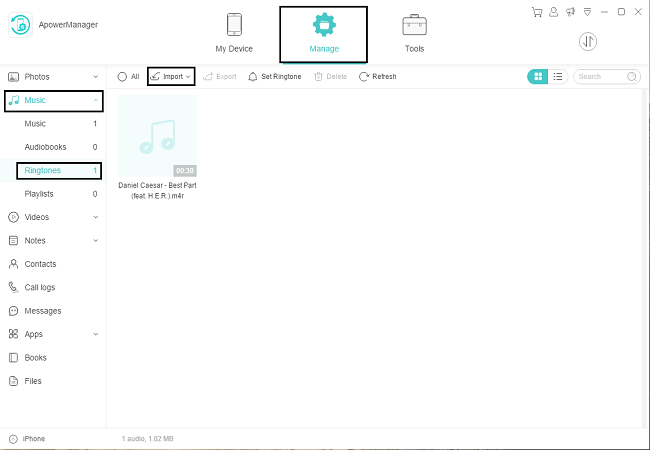
Step 3: To start transferring ringtones to your phone, click “Manage” > “Music”, then click “Ringtones” under the “Music” tab.
Step 4: From there, click the “Import” button and then select from “Import File” and “Import Folder”. Select the ringtones you wish to transfer to your iOS 13 and then click “Open”. The ringtones will then be transferred to your iPhone/iPad immediately.
iTools
iTools is also a good choice for you to put ringtones on iOS 13 without iTunes. It is also a phone manager, but unlike ApowerManager which is available for both Mac and Windows PC, this is only available for iOS devices. A special feature called “iTools Ringtone Maker” is also included in this program. It allows you to edit and make your favorite songs into unique ringtones. To transfer ringtones to iOS 13, just follow these steps below:
Step 1: Download the program on your PC and run the program.
Step 2: Use a lightning cable to connect your phone to PC.
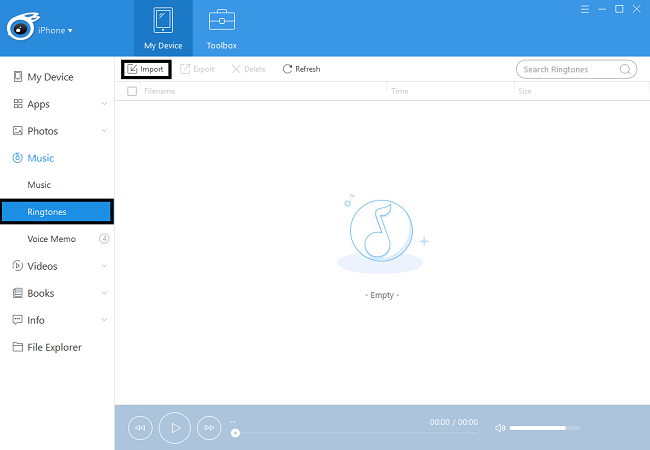
Step 3: Once connected, click “Music” at the left side of the interface and then click “Ringtones”.
Step 4: Go to your file location on where the ringtones are saved on your PC then simply drag and drop them to the user interface of iTool or click “Import” to transfer your ringtones from PC to your phone.
Extra tip: how to transfer ringtones to iOS 13 from another phone
There are instances that you might want to transfer ringtones to your iOS 13 device from another phone but unfortunately you don’t know how. AirMore can solve the problem. You can use it to transfer data from phone to phone, PC to Phone and vice versa wirelessly. Follow the steps below on how to add ringtones to iOS 13 from another phone using AirMore.
Step 1: Download and install the program on both devices. For iPhone, just get it from App Store; and for Android, download it from Google Play Store.
Setp 2: Connect your phone and iOS 13 device to the same WiFi network. Then launch the AirMore app on both devices.
Step 3: On both devices, click “More” icon. Then, under “Other tool” option, tap the “Phone Transfer” button.
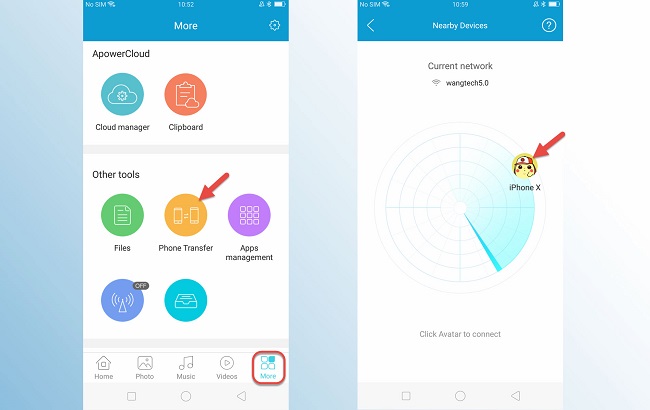
Setp 4: The available devices will be shown. Tap the avatar icon of the target device to connect.
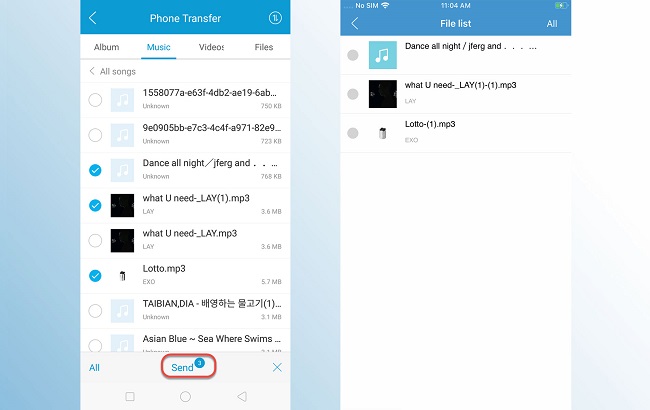
Step 5: Once connected, select the ringtone that you wish to transfer then click “Send”.
Conclusion
And those are the best ways to transfer ringtones to iOS 13 without any need for iTunes. No need to have a hard time looking on where to download ringtones to iOS 13. Simply by using the tools mentioned above, you can now transfer ringtones to iOS 13 from computer or any mobile device with ease and in an effective manner.
Leave a Comment