It seems that this year should be named “Apple’s Year” for Apple Inc. continuously unveiled new products or systems in the past months of 2015, iPhone 6s, iPhone 6s Plus, iOS 9, Apple TV 4 and now Mac OS X EI Capitan. When it comes to Mac, many people prefer to use Windows PC rather than Mac – a little closed system. However, on the whole, Mac still attracts lots of users for its exquisite design and strict product quality. After Mac released the latest system – OS X EI Capitan, named for the iconic landmark in Yosemite National Park, an increasing number of users wonder if they can manage their iPhone on Mac just like before or with a more efficient way. Now, here are methods on how to transfer data from iPhone to Mac OS X EI Capitan so that you can manage iPhone data on Mac with ease.
Three Ways to Transfer iPhone Data to Mac
- iTunes – transfer with USB cable
- AirMore – a free and wireless transfer tool
- iCloud – save your data to cloud
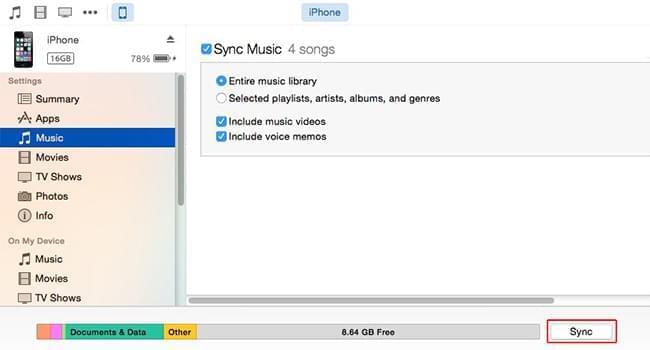
iTunes – Sync iPhone Data to Mac
With iTunes, you can sync information on iPhone with Mac, such as movies, music and photos and so on.
- Open iTunes on Mac.
- Connect iPhone to Mac with included USB.
- After clicking on iPhone icon, tabs will appear on the left side of iTunes interface under “Settings”.
- You can turn on syncing for Music, Movies, Photos, Books, etc. Choose an item, then click the box next to Sync.
- Click the “Sync” button in the lower-right corner of the interface to transfer your data to Mac.
Cons:
- USB cable is needed.
- In order to finish the whole sync process, lots of time will be taken.
No USB cable at hand? The methods below will help you transfer iPhone data to Mac wirelessly.
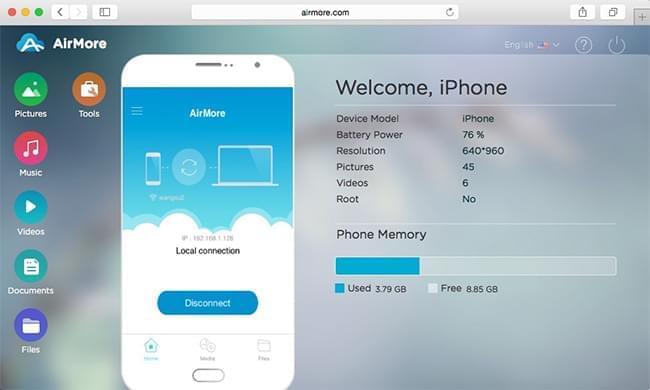
AirMore – Manage iPhone Data on Web Like A Breeze
AirMore is a free and powerful iPhone management tool based on web. Therefore, you can use this tool on any kind of computer, Windows PC or Mac, as long as your computer has a browser (Google Chrome, Safari or Firefox).
- To begin with, please set up your iPhone and Mac in the same Wi-Fi network.
- On iPhone, search “AirMore” from App Store and then download and install it on your phone.
- On Mac, go to “AirMore Web” page by visiting “airmore.net” on the browser. At this moment, a QR code will be loaded.
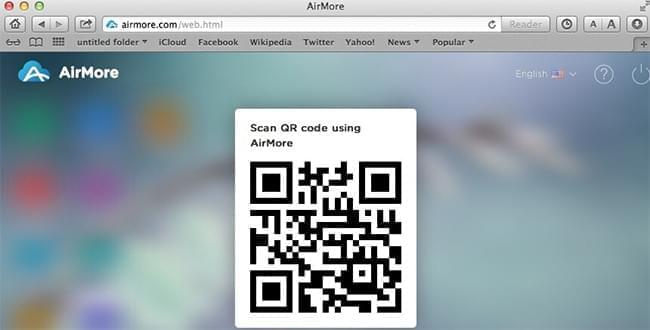
- Run this app on iPhone and then click “Scan to connect” to scan the QR code on Mac screen.

After connection, the major information about your iPhone will appear on the web page. Now, you can transfer nearly all data to Mac. For instance, you can use AirMore to transfer iPhone photo to Mac effortlessly. Certainly, music, videos, documents and other files are also available.
If you don’t want to download any app on your phone, you may use iPhone’s default tool.
iCloud – Save Your iPhone Data to Cloud Automatically
iCloud can save some of your iPhone data to cloud by itself so that you are able to get them on any device at any time.
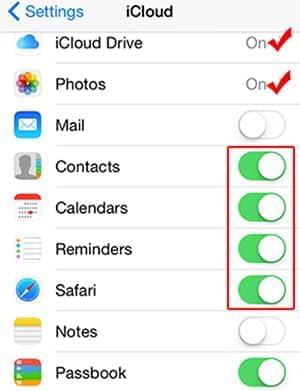
- On iPhone, go to “iCloud” under “Settings” and sign in your Apple ID.
- Keep the key sliders open so that they can be loaded to cloud successfully.
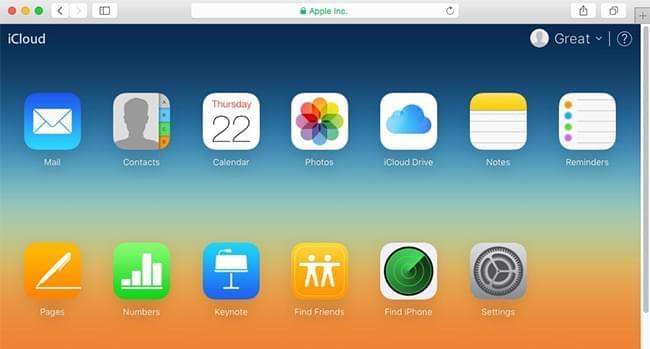
- Go to “iCloud.com” and sign in the same Apple ID on the browser from Mac. Then you can download your iPhone data to your Mac from iCloud.

Cons:
- It’s not able to save data like music, documents etc.
- It only has 5GB free storage which is not enough for most users.
All the three methods above can help you transfer data from iPhone to Mac OS X EI Capitan. However, taking all factors into consideration, AirMore will be your best choice. On the one hand, with this handy tool, you can transfer data between iPhone and Mac free and wirelessly. On the other hand, it’s very easy to use and doesn’t have any restriction.
Leave a Comment